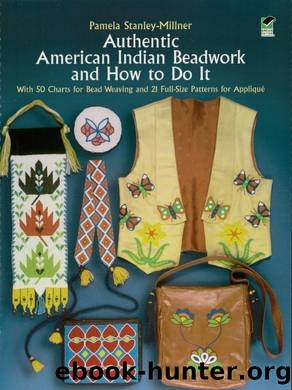
Authentic American Indian Beadwork and How to Do It by Pamela Stanley-Millner

Author:Pamela Stanley-Millner
Language: eng
Format: epub
ISBN: 9780486141626
Publisher: Dover Publications
Published: 2012-10-09T00:00:00+00:00
Appliqué Beading
Once you choose a design for bead appliqué, place tracing paper over the full-size pattern in the book, secure it with paper clips and copy in pen or pencil. Donât copy the color key numbers in the pattern; itâs easier to refer to them in the book as you work.
Itâs also necessary to choose the material on which to bead applique. Suede, garment leather and velvet are all suitable for bead appliqué; the projectâpurse, vest, wall hangingâwill determine whatâs best. Keep in mind whether the bead colors in the pattern will stand out on the color background you choose. If the background material must be a given color, you may wish to adjust bead colors for a stronger effect.
Once you have a pattern tracing and material to work on, youâre ready to transfer the pattern from the tracing to the material. Work on a piece of material larger than the finished dimensions of the project; cut to size after the applique beading. Place the material right side up on a flat surface. Next, place a sheet of carbon paperâlarger than the patternâon the material, carbon side down, followed by the pattern tracing, tracing side up. Holding all three layers securely in position, firmly retrace the entire pattern with pen or pencil; the pressure should transfer a carbon outline of the pattern to the material for bead appliqué. No special carbon paper is required; you may use dressmakerâs carbon if you prefer, especially if you need a light outline on a dark material.
Once the design is transferred and the material is ready for applique, stretch it taut in an embroidery hoop or stapled to a frame. Use the color key accompanying the pattern in the book as a guide to the bead colors you will need. Size 0 nylon thread, a No. 16 beading needle, a No. 9 sharp needle, scissors and beeswaxâonce gathered together, youâre ready to begin.
In beading all design elements, outline first, then fill in the interiors. Whether to outline with one, two or three rows of beads is determined by overall design proportions. Bead the interiors along lines that enhance the look of a given motif. Study the finished bead appliqué projects on the front and the inside back covers for examples of interiors beaded to advantageous effect. You will also notice variations in outlining.
Thread each needle with a double strand of nylon thread two feet long, ends knotted together. Remember to wax it. Begin with the beading needle. Draw it from the back to the front of the stretched material, and pull until the knot is tight against the back. Do this at a point in the pattern where it is logical to begin laying down beads to outline a design element (for example, a leaf, a petal, a bud). Then string enough beads on the thread to cover the outline of this design element, but not so many that there wonât be a loose end of thread with which to tie off.
Now take up the other needle, the No.
Download
This site does not store any files on its server. We only index and link to content provided by other sites. Please contact the content providers to delete copyright contents if any and email us, we'll remove relevant links or contents immediately.
On Writing A Memoir of the Craft by Stephen King(4921)
The Doodle Revolution by Sunni Brown(4732)
A Simplified Life by Emily Ley(4146)
Mummy Knew by Lisa James(3671)
Marijuana Grower's Handbook by Ed Rosenthal(3662)
Better Homes and Gardens New Cookbook by Better Homes & Gardens(3572)
Figure Drawing for Artists by Steve Huston(3431)
Paper Parties by Erin Hung(3410)
Draw Your Day by Samantha Dion Baker(3337)
The Genius of Japanese Carpentry by Azby Brown(3278)
The Code Book by Simon Singh(3163)
Japanese Design by Patricia J. Graham(3154)
Dangerous Girls by Haas Abigail(3020)
The Curated Closet by Anuschka Rees(2956)
Lions and Lace by Meagan Mckinney(2954)
How to Make Your Own Soap by Sally Hornsey(2882)
The Checklist Manifesto by Atul Gawande(2833)
Zero to Make by David Lang(2772)
The Wardrobe Wakeup by Lois Joy Johnson(2765)
